A Beginners Guide to Shooting the Night Sky
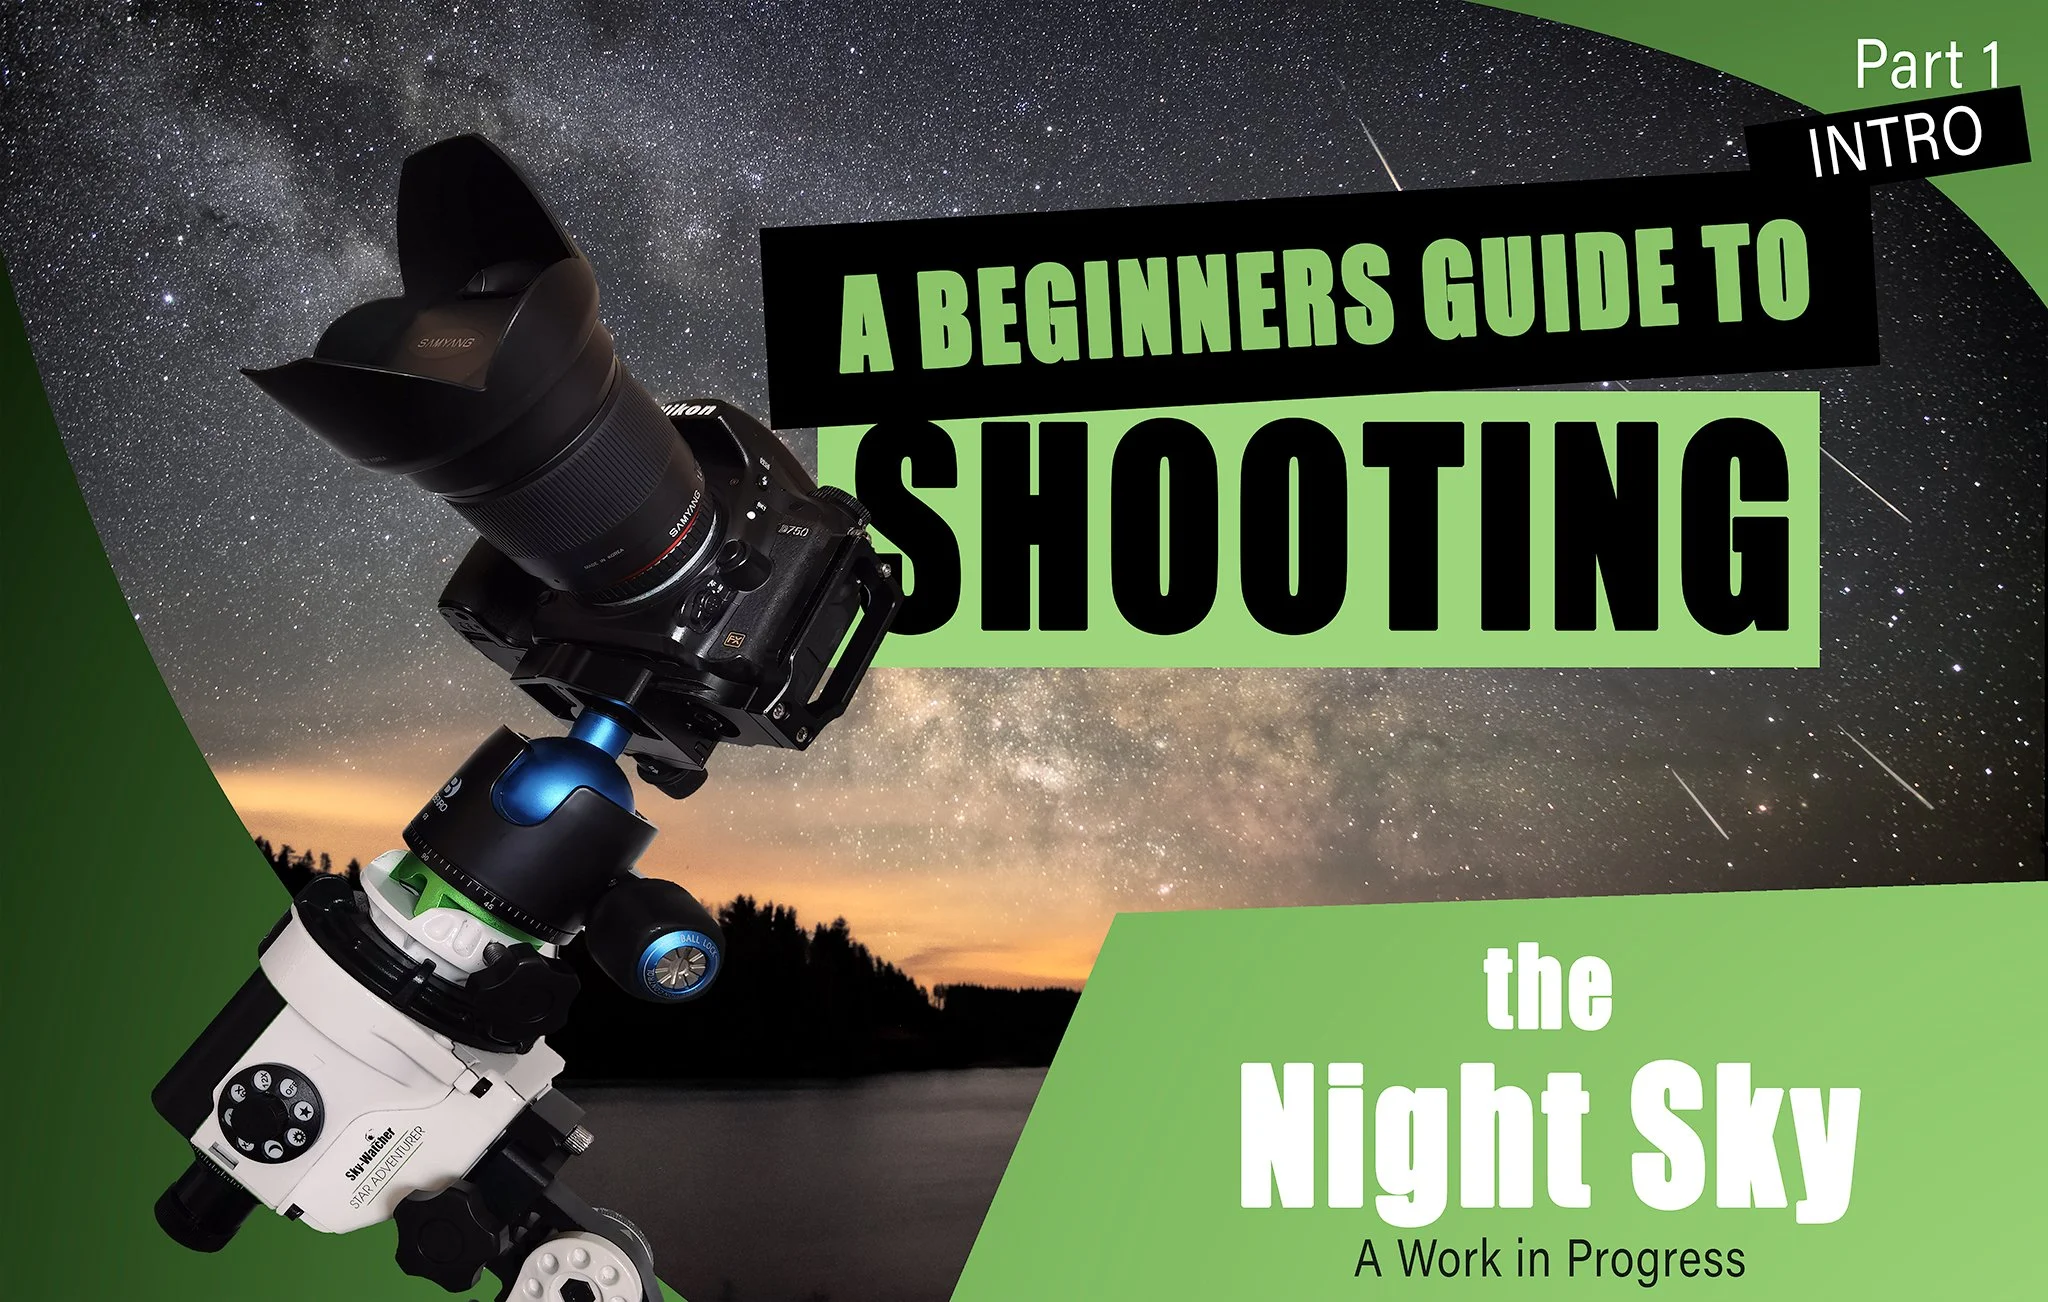
Part 1 - Introduction
The title of this blog post should really be taken in two ways, it’s a guide to shooting the night sky intended for complete beginners and is written by a beginner, from a beginners perspective so will also be a teaching aid for myself as I actually hope to learn as much as I impart by writing this guide but ultimately hope it can help someone just starting out into astro-landscape for the very first time.
My own knowledge, experience and ability is extremely limited so this will not be a how best to shoot the night sky and more a break down of how (I) shoot the night sky, so if you already have anything over and above a basic understanding of low light or night time photography you’ll possibly not learn much from this guide unfortunately and there’s a very good chance you’ll know details of most of these topics a lot better than me. (if you do read it and have any tips or helpful comments to add I would love to hear them in the comment section below) because, as I mentioned above! I hope to learn just as much writing and researching the information for this guide as I continue to write it.
Anyway! What my intentions are for this guide is to try and explain as best I can, some of the tips tricks and techniques that I’ve picked up over the last few years of shooting the night sky, and break them down into sections of some of the topics and considerations that you have to make when setting out to shoot the night sky, considerations like, ‘Digital Noise’ and ‘Shot Noise/Grain’, ‘Exposure Lengths’ to avoid star trail, ‘Post-Production’ processes, equipment, apps and websites, and much much more. and as mentioned in the thumbnail, this is a work in progress. and with any luck will be subject to change as my own knowledge progresses, so if you want to keep updated please consider subscribing to my mailing list where I’ll keep you up to date on new updates and new features that’ll be added as I finish each topic to add to this guide.
I was actually inspired to write this blog/guide when I decided to take out my D3200, my first ever camera and lens setup with me when I was out shooting a few weeks ago it got me thinking about a time when starting out when I had a million and one questions about learning photography but never really knew what questions to ask or where to go other than youtube to get the answers, on top of that I also thought I’d see how well that set-up would cope compared to my current set-up and see if I’ve actually learned anything since I started out or if it’s all been down to the equipment that I’m getting better results from back at the beginning, and to be honest I’d say a little bit of both, equipment really does go a long way in creating better night sky images, and knowledge on how to use that equipment to the best of it’s abilities really does help to refine the quality of the finished images.
Anyway here’s what I discovered from that outing.
Part 2 - Equipment (Head to Head)

Nikon D3200 with Nikkor 18-55mm f/3.5 v Nikon D750 with Samyang 24mm f/1.4
Yes most of us have been there! We’ve had an acute case of GAS (Gear Acquisition Syndrome) at some point, well I presume most of us have anyway, but what I discovered is that you should never let your equipment hold you back from pushing the abilities of your knowledge. If the equipment you currently have doesn’t produce the shots or end result you want, try and use that lack of results to push yourself to learn and expand your knowledge base, apply new technique before heading out and buying newer, (“better”) more expensive equipment first (as “more expensive” does not always equate to “better results”) In general it does, but not necessarily always as the knowledge of (why) you need that better equipment is more important in my eyes. Doing this will serve you better when you do finally move on to better more capable equipment in the future in my honest opinion. “Better” equipment will absolutely produce “better results” in many cases but only if you already know why entry level equipment isn’t producing the results you were looking for in the first place. So much of the joy I got at the beginning when first taking up photography was the trial and (many errors! lol) that occurred along the way.
For me, the biggest hurdle I encountered when shooting the night sky with my first camera was noise/grain. The fear of pushing my ISO to anything above ISO800 for fear of introducing noise only created dark images with only the brightest stars being visible at 20-30s exposures at f/3.5+ (f/3.5 being the wide open limitation of my first lens). and when I did increase my ISO sensitivity the noise/grain in the images made most of, if not all the shots unusable without posts processing methods to remove the noise in the images. (‘Digital Noise’ is the digital signal that builds up in your images from minor interference in your camera’s sensor and is pretty much just the visual equivalent to digital noise (static noise) in a music track. (Or that’s how I see it anyway). This noise/grain is amplified with higher ISO settings, some cameras are better at dealing with avoiding digital noise than other cameras are, and ‘ISO invariant’ camera bodies will produce the same amount of digital noise at all ISO settings, (I plan to do a more in-depth section on ISO invariance later in this series of blog posts)
I decided to try and compare my first digital camera and lens from around 7 years ago (Nikon D3200 with 18-55mm f/3.5) to my current camera set up, (Nikon D750 with Samyang 24mm f/1.4)


Nikon D3200 with Nikkor 18-55mm f/3.5 Nikon D750 with Samyang 24mm f/1.4
On the left is the first camera I ever owned, a Nikon D3200 with AF-S DX 18-55mm f/3.5-5.6G VR (kit lens) which was a birthday gift that sparked a keen interest in learning as much about photography as possible, this camera was one of the most recommended entry level cameras at the time (mid 2015) and I absolutely loved it. You can pick up a second-hand body and lens of these models from around £160-£200, I recommend checking out MPB, Camera Jungle, Parks Cameras or Wex for second hand equipment as I’ve never had any issue with any of these suppliers for any of my second-hand equipment in the past.
Anyway, as I started to learn the camera functions on this camera and learn more about photography techniques in general, I began to realise some of the limitations that came with an entry level camera and lens combination such as both of these. (This is not a negative or indeed a bad thing when starting out as this helped me to push my understanding of ‘WHY’ these limitations occurred). Entry level equipment is just as valuable in terms of the confidence, experience and learning potential it gives as any mid or high-level equipment is in monetary value terms. (No point in all the expensive bells and whistles if you don’t know how to play them).
So, with that thought in mind I decided to test and compare the older d3200 and kit lens I had with me and see how they both compared in a head-to-head shootout using the same camera and lens settings on both set ups.
Given that the Nikkor 18-55mm lens aperture was wide open at f/3.5 I had to use that as my benchmark aperture, with the D3200 being not so great with higher ISO settings I chose not to go over ISO3200 and using the Photopills app I calculated the ‘NFP Rule’ to get a shutter speed for both and just went for 13s for comparability.
So, the settings for both cameras are as follow
1st comparison - Direct Equivalent
Direct exposure equivalent using the NFP Rule to calculate the maximum exposure setting for each camera and lens set-up, so straight off the bat you can see that both cameras have produced pretty similar RAW files in regards to exposure values.
Nikon D3200 Nikon D750


13s (NFP Rule). ISO3200, 18mm (24mm crop frame equivalent). f/3.5 13s (NFP Rule). ISO3200, 24mm (18mm full frame equivalent). f/3.5


Auto White Balance & Auto Exposure Applied


D3200 x 200% crop D750 x200% crop
As you can see from the results when you zoom in, the SOOC (Straight Out Of Camera) shots are very similar as they were both shot at the exact same camera settings, it’s not really until you take the image into Lightroom and apply auto white balance and auto exposure that the noise/grain becomes more apparent, in the Nikon D3200 + Nikkor 18-55mm f/3.5 shot the noise is way more pronounced than it is on the Nikon D750 + Samyang 24mm f/3.5 shot and even more obvious when zoomed in to x200% that you can see the high noise levels that introduced lots of magenta and red colour noise into the shadows of the image, this is compounded even further by the ‘Shot Noise’ that’s introduced by the lower spec Nikkor kit lens, you may also notice as you zoom in that the D3200 shot also has a lot of ‘Hot Pixels’ compared to the D750 shot. (Hot Pixels = Bright red, green or blue pixels that are created by over heated pixel in your image sensor).
Part 3 - Noise, Coma & Distortion
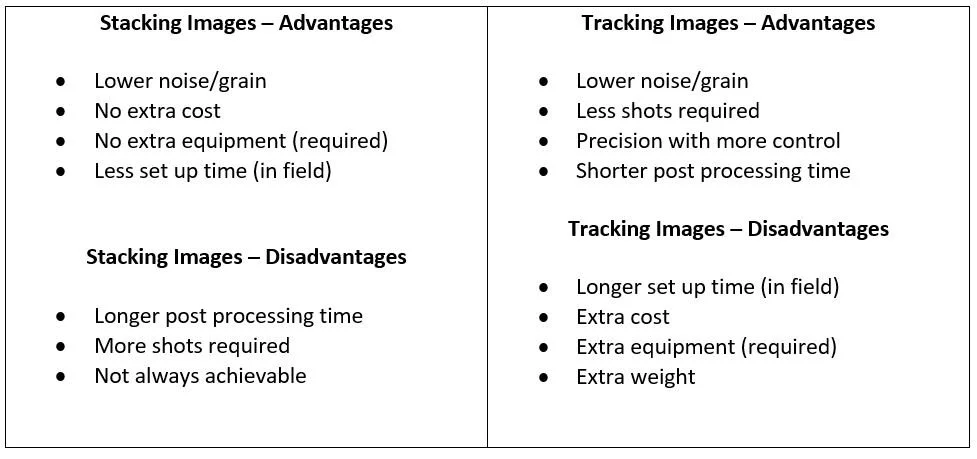
So, with that in mind, there are two main routes to take in Astro photography to deal with eliminating noise/grain from your images when you’re limited by the equipment you currently have. and each has its benefits and drawbacks.
These are, ‘Stacking’ or ‘Tracking’. However! whenever possible I prefer to use both ‘Track’ and ‘Stack’ to get the most out of my image. I’ll briefly go over these just now with what I’ve found to be the main benefits and drawbacks for each
A problem I’ve came across when stacking images (and the reason I said ‘Not always Achievable’ as a disadvantage for stacking) was that some lenses have a lot of warping or distortion that create comatic aberrations (coma). Below are some examples of comatic aberrations under different lenses and settings. If you’ve ever taken photos of the night sky before you might have noticed the stars at the edge of the frame are a little bit stretched out, this is caused by comatic aberation.
Image Source: Marrianne Oelund - https://www.dpreview.com/forums/post/62087147 [Date Sourced: 09/09/2022]
And below is an example of different distortion possibilities you might run into depending on what type of lens you use and the glass layout that lens is comprised of. Many lenses have dedicated lens profiles that you can download and use in the likes of Lightroom, Photoshop, Capture One, and in other cases you can simply create your own custom lens profile to remove comatic aberration and lens distortion yourself.
Image source: The Seven Deadly Aberrations By Roger Cicala Published October 5, 2010, https://www.lensrentals.com/blog/2010/10/the-seven-deadly-aberrations/#:~:text=vice%2Dversa).-,Coma,blurred%20tail%2C%20hence%20the%20name. [Date Sourced: 09/09/2022]
But ultimately my point with this problem is that as the stars move across the sky it becomes very difficult (and depending on the lens you use can even become impossible) to align frames correctly for stacking without the help of a star tracker to keep the stars in the same section of the frame for each stacked layer of your image.
Here’s an example of a failed 8 x shot stack using the above-mentioned Nikon D3200 with the Nikkor 18-55mm -f/3.5-f/5.6 lens. As you can see the stars in the centre of the frame where there was less distortion have aligned up a little bit better than the stars at the outer parts of the frame those have not lined up at all. This is what happens with certain lenses when trying to stack without the aid of a star tracker. some software’s are better than others at aligning stars, but ultimately, it will not be as good as aligning frames where the stars are tracked from shot to shot.
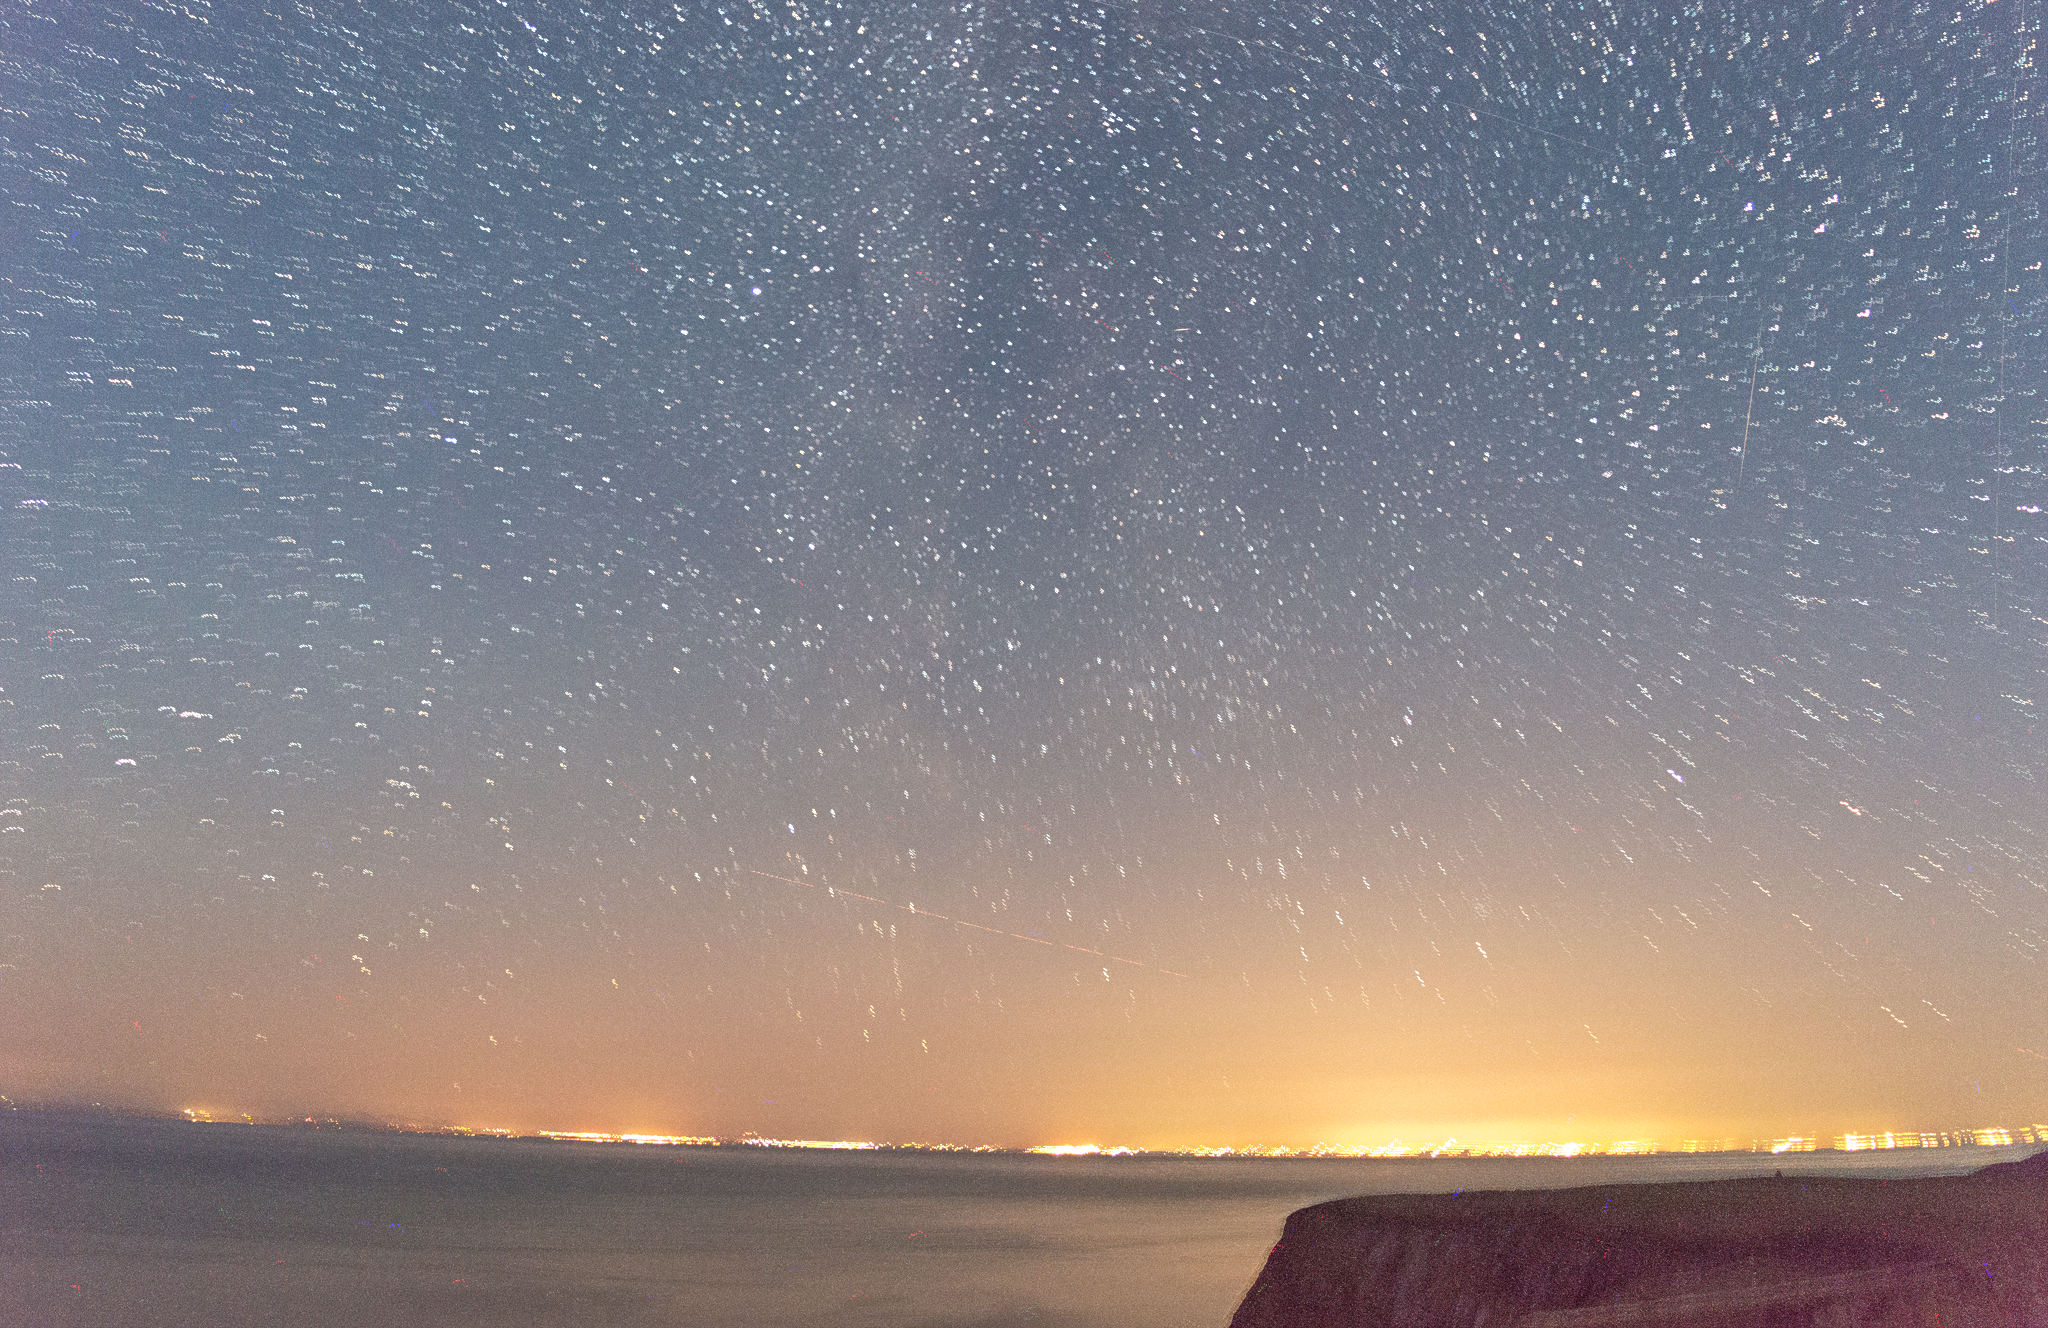
Failed Stack of 8 x frames using the Nikon D3200 + Nikkor 18-55mm f/3.5-f/5.6 settings 20s, ISO3200, 18mm @f/3.5
Part 4 - Equipment (Conclusion)
So, in conclusion, Although I really enjoyed getting my first camera out and seeing just how far I could push it to see how well it might keep up with my current camera I could see that equipment does play a large part to how far you can go with night sky photography but also in doing so bringing back some fond memories from my first nights out shooting the night sky for the very first time and just how far that passion to learn and the enjoyment of the photographic learning curve has taken me and also realising just how far I’m still yet to go has really brought a smile to my face.
So, no matter what equipment you have, my advice is just get out and use it to it’s full potential and learn where it’s limitations lay, that way you get the enjoyment and satisfaction of knowing you’re learning something new and will also give you a better idea of where you’re next purchase is best placed for your needs if you decide you want to move forward in that field.
In Part 5 I’ll be showing how I set up and use my Sky Watcher - Star Adventurer star tracker to track the stars to create sharp, noiseless long exposure frames of the night sky and why I prefer to track and stack over simply stacking my images.
But for now, thanks so much for listening to me prattle on if you even got this far and please accept that all of the above mentioned is just opinion, My experience and equipment knowledge is very limited. I just hope that if nothing else some of the information I’ve managed to give so far is helpful to at least someone starting out and in part two I’ll cover stacking and why stacking helps to reduce noise in your images.
Products, brands and Companies mentioned include
Nikon D750 Body: https://amzn.to/3EreuCe
Nikon D3200 with 16-55mm kit lens: https://amzn.to/3Ve1qa2
Samyang 24mm f/1.4: https://amzn.to/3hShyzL
Sky Watcher, Star Adventurer Pro: https://amzn.to/3TXhJXH
Photopills
MPB - https://www.mpb.com/en-uk
Camera Jungle
Parks Cameras
Wex Photo/Video
Disclaimer: Products, brands, and companies mentioned in this blog have no sponsorship support. I will add some affiliated links to some of the products used that will help to support the running costs for the website but my advice or opinion in this blog post and upcoming blogposts in this guide is free of any bias. I use these products, brands, and companies because I have previously used them and explicitly trust them enough to recommend them to you.