Quick & Easy Colour Grading
Quick and Easy Colour Grading using Curves…
Colour grading is possibly one of the easiest things to do in post processing to make your photos into an image that stands out from the crowd by giving it a cinematic feel, (I say that with a wry smile as I write this)… Because for all I say “it’s easy” (which it is!), I struggle with creative aspect of colour grading personally. There’s several ways to do it and several great applications and plug-ins on top of all the great Adobe Photoshop and Lightroom tools that make colour grading easy and fast, I just don’t have the creative ability to put the knowledge of how to use them into working practice myself so tend to shy away from applying it most of the time.
That being said, I do enjoy messing around trying out colour grading techniques I come across on YouTube, but the easiest and quickest way I’ve found for colour grading photos (outside LUT’s (Look Up Tables), plug-ins and filters) is using the Curves Adjustment tool in both Lightroom or Photoshop. the colour and mood a little bit of colour grading can inject into a photo is really enjoyable to see when you look at the before and after at the end of your post processing session, so I’ve made myself a promise that I will try and practice this technique a little more until I’m happy and comfortable enough to post more of the end results on my page in future.
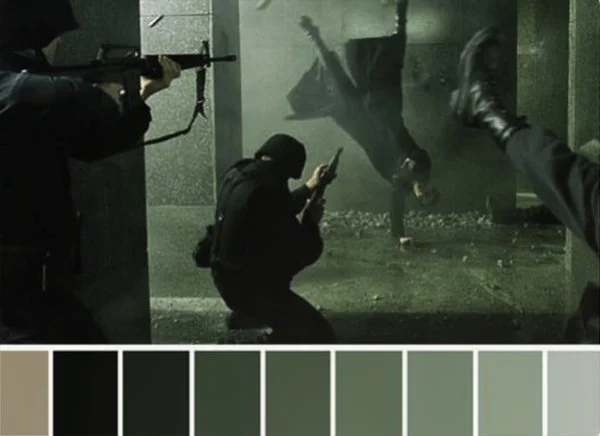
If you already have an idea of what sort of direction you want to go in with your colour grading that’s great. many people like to get inspiration from film and TV when it comes to inspiring a certain cinematic look, like the cool hard greens of films like the Matrix, or soft warm tones to give a dreamy feeling of nostalgia or hope, muddy brown earthy tones from TV shows like the Walking Dead to create drama or cold sheer blue steel tones from movies like the modern Batman movies for that dystopian future bleak feeling. The combination of colours you can create in your colour pallet when colour grading your images is close to limitless, as with a single 8bit image you have exactly 16,777,216 Million colours to play with. (281 Trillion colours if working in 16bit).
This is an example of a colour grade using the colour palette from the film ‘The Matrix’ as inspiration to make a cold feeling future bleak feel to the image.
Colour Palette from the movie ‘The Matrix’
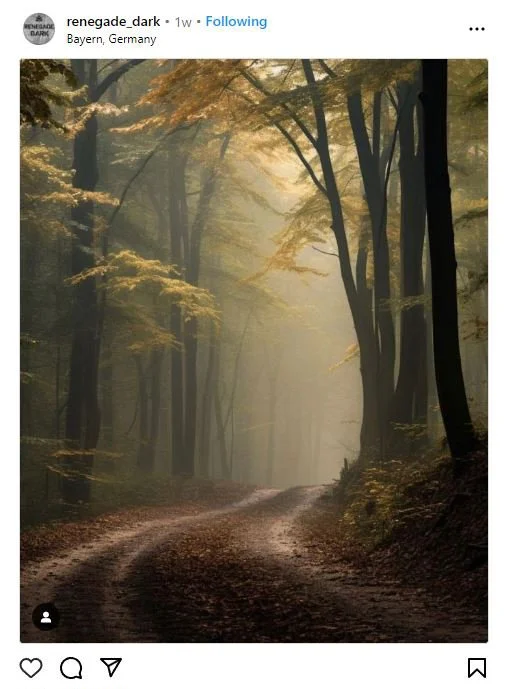
Or if you’re like me and just like to wing it and take inspiration from things you come across while browsing through social media you can simply copy and paste a screen shot from a movie, poster, photo or social media post and use that as a starting point. today I was scrolling through Instagram and seen this lovely image that gave me the idea to process this misty treeline photo from a few weeks ago and also gave me the idea to write this blog post. so if in the unlikely event renegade_dark ever reads this post. I just want to say thank you for sharing such a lovely photo and for the inspiration it gave.
This is the colour grade using the photo from renegade_dark as inspiration to give a nice autumnal warm colour palette and warm feel to the image
Or! you can completely just wing it and see what ends up looking good to you!
So lets have a quick look at how you too can quickly and easily colour grade your photos using curves in Adobe Photoshop. but before we do! Please note that this is my first full one take video so my nerves are completely jangled. also! I have to apologise for the horrible voice, for any mistakes I made and for anything I messed up but more than that I have to apologise for the amount of times I said “sorry” in this video. I promise I will try and make my videos a little bit better as I start to find my feet. my confidence is not the greatest at the best of times to be fair! but I really do hope I can progress and that this information on curves for now is of some help to anyone.
Thank you so much to those who got this far, if you would like to continue to see more of the page and some of the photos I’ve taken so far please don’t hesitate to have a wee browse through the portfolio pages and other blog posts at on the menu drop-down at the top of the page.
Thank you so much once again, till the next time…


